The ideal way this game is meant to be played is with the physical version on TheGameCrafter, but I wanted to make free digital alternatives that anyone could experience. So I'd recommend getting the next best experience by downloading the free digital version of the game on Steam Workshop, if you have Tabletop Simulator. That game's pretty cheap especially during Steam sales and is great for playing other board games digitally.
And lastly, I did make a mini-demo of 2 of the game modes that's available on itchio. I couldn't get it to upload and embed in the browser due to some plugins I was using, but it's available for free to download on itchio if you're interested!
So with this update, I did finally publish all of the pages above! Publishing on TheGameCrafter was surprisingly easier than I was expecting. Because I already bought 2 versions of the game physically, it was just a push of a button really to get it live and up for sale. I previously took precautions to split it out into different versions in case people wanted to buy cheaper and smaller alternatives to it. So that's all been implemented.
With those split out versions, I also bought a version of the game for myself. With the base set, I made a new small box to hold just the base set of cards, and it fits nicely into the bigger box.
And while the 3D printed Gek figures aren't included on TheGameCrafter, I do have the 3D print file available on Thingaverse. And I printed and painted 2 versions which I talked about in a previous post.
And finally, after sorting through everything and making sure it was all ready to go, I wrapped the present up to give to my brother for Christmas.
So overall, this was a really fun project! It was very different and involved a lot of moving parts, but I'm really happy with how it all turned out. I love having physical aspects to these kinds of projects, so this was really cool to have overall. And it's the first time I printed 2 versions of a physical gift so I could keep a copy for myself, so that's fun too.
While I didn't make quite as much progress on the digital version as I originally thought I would, I'm okay with that. It was an afterthought and not really the focus of this year. I still learned a lot about JavaScript and RPG Maker from it and I can use that in other projects, so I'm happy with where I ended up.
My favorite moments were seeing the physical game pieces with my art and characters on it. It just all felt so official! I haven't given the gift yet at the time of writing this, but I'm also really looking forward to giving the gift to my brother and playing it with him and my mom as well. I had a lot of fun playtesting with my friends the one time I did a couple of months ago, so I'm looking forward to playing it with others more.
And with that, I've had 15 devlogs about the process on this project. I'll leave you with some final photos I took of the final cards:
Thanks for sticking through these posts and reading about my process!
I spent a lot of time working on the digital version of Nay Saga and finished up 2 of the game modes! So the menus are functional and those game modes are playable. It’s fully set up if I did end up revisiting this project to add a story mode or additional game modes, I could. I’m not sure if that’ll happen, but I wanted it to be an option at least!
I started to implement menus and overall navigation for the digital game. This way, the player can access the different modes available as I complete them. It was pretty straightforward with a lot of show choices and plugin implementations. This included making a custom title screen and menus. I also finally found some background music for the game!
Something I did here that’s a little different is I disable autosave from the start of the game, then the Story option starts a new game. From there, you can choose to either create a new story save file or load an existing save file. This means the load menu’s not actually using the built-in mode, but rather script commands instead. And when you start a game, it would turn autosave back on. I didn't actually get to the story mode for this first version, but I wanted it to be implemented in case I ever decide to come back and do it.
And similarly, I have the Free Play mode actually starting a new game and then sending the player to a specified map. This way, it goes straight into loading the map that shows the game modes choices.
Then I found the CGMZ Encyclopedia plugin that I used to create an in-game card database. It shows the card image at the top and then has the details about what’s on the card at the bottom. This was a huge feat, because I couldn’t find built-in ways for a lot of these parts, so I ended up having to dive into the plugin code and made my own edits to modify what I wanted it to look like more specifically.
I started by familiarizing myself with the plugin code. The first thing I did was update the name at the top on the right to show the character’s first and last name. I store their first name in the Name value and their last name in the Nickname value, so this was just a matter of changing what’s displayed to show both of them.
The first big feat I made after that was showing the card visual. By default, actors could only have their faceset, charset, or battle charset shown, while enemies would take their database image, and you could set “sketches” for custom aspects. So I learned a lot about how to show images in RPG Maker through code. I added my own “Sketch” drop-down in the plugin for the Actor by adding to the switch case, then I found some code for generally using the blt() code to show an image and essentially load it into a sprite on the screen. Thankfully this was a bit familiar from when I was learning PyGame earlier this year and that had a similar blit() function for showing images.
With that code, the image was still staying on the screen even after selecting one of the unknown entries. So I added a new part to the unknown entries code that shows a dimmed out image of the deck/card back if they haven’t unlocked the card yet. This used basically the same code except instead of using the Actor’s image, I used a specific reference to one.
Then I wanted to add icons next to the Types, but I have those stored in Classes, which don’t have icons in the RPG Maker Database. So I ended up learning a bit more about the VisuStellaMZ Message Core plugin’s Text Code Replacements feature. With the text code \Type[ID], I could check the specific character ID’s class and print that. I’m importing these notetags from Google Sheets, so I can automate that number for each character. So it checks which type it is, and shows the icon depending on what that type is before the name of it.
I then edited the Encyclopedia script a bit more to show the Type icon before the name of the Type using that replacement code I just made. This way, I could use the built-in showing of the “class” property with the Type.
I wanted to then show all of the Traits in a row, but I currently have them listed as skills and equipment, so I needed a way to combine them. I made a new text replacement code that finds all of them and then lists them out. This way I could use this in the Database to list them all under the “Notes” setting.
Then I made a few more tweaks to remove features I didn’t necessarily want to use. The first one was to remove the “overall completion” percentage at the bottom, because I only have 1 category that I’m using, so it was just repeating it twice. Then I removed the ability to click on characters, since I’m not having more data that it needs to scroll, so I thought it was a bit unnecessary. This just meant commenting out some of the code.
And then I added a new “View Cards” button on the Free Play mode screen so the player can automatically unlock all of the cards and see them when they’re not in the story mode. This will be a good way to just view all of the cards in the order you get them and reference them in the game.
I further customized the Free Play mode by allowing the player to choose a mode, then they choose which character to play as. I added new pictures that show on the left side when the player hovers over a game mode so they can view what it looks like in play and a short description.
I also added hover images for selecting the character. Each time the player makes a choice, they can loop back to the previous one if they press the cancel button or click the back arrow on the right.
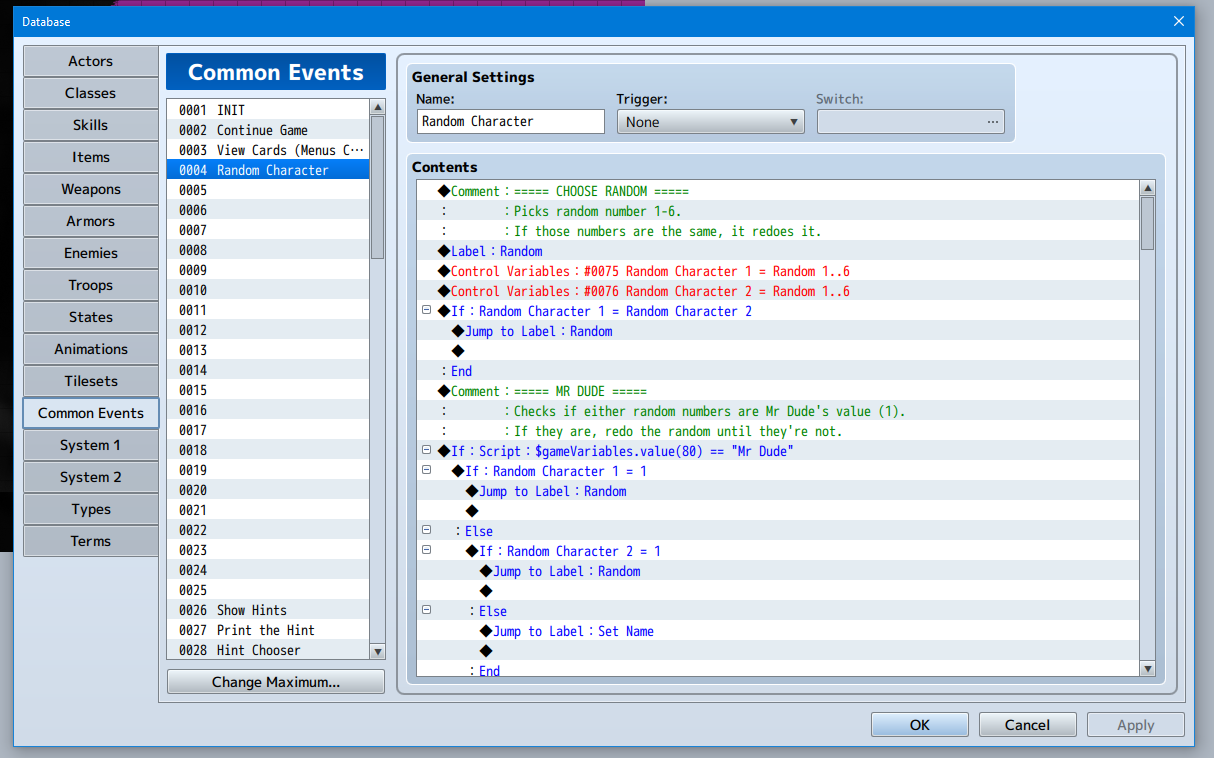
When you choose a character, it will set the player character name. Then it’ll randomly choose the other 2 characters that you face against. I had to add a lot of conditional statements and looping to ensure the 2 characters it choses aren’t the same as the player character or each other.
Then I edited my Google Sheet for importing to the RPG Maker Database so I could include the Notes section. I also edited the formulas to more automatically import with 2 VLOOKUPs in a row so I just have to copy that first column in. This way, I could more easily rearrange the order I want them to appear in within the Database.
So then I went through every Eventure and ordered the characters in order of when they’re introduced in the story. This way, I could have them display in that order in the card database, and if I ended up making the story mode.
And from there, I officially imported every character into the Database in the project! So they all populate in the card database. I also added a new “First Appearance” part that uses the profile field.
And that’s it! The digital game is as finished as it’ll be for now. At the time of writing this, I only have a few more weeks until it's being shared with my brother, so all that's left is final polish and making sure everything's public and how I want it for this final iteration of the first version.
The physical game is complete! It was exciting to see all of the cards fully printed and everything in the final box. Other than the final post, this will likely be my last post about the physical elements of this game!
When the box came, I started by counting the cards and making sure everything was there. For some reason a lot of blank cards printed and Pigger and Karol were printed twice. I’m not sure how that happened, but I ended up having a lot of extra blank cards because of it.
I played all of the modes with the final cards and it ended up being a lot more fun with the variety of cards! I also realized I may not have to limit as many traits in the Channel 6 Get Together mode because of the large variety.
Then while I was playing, I decided to put a twist on the last mode, the CourtNay Incident. I made some updates to how it plays (so it will slightly differ from what was written in the rulebook). Now the players play all of their 3+ Trait matches at the same time and can collaborate further to decide which characters they should play the cards on if they fit into multiple columns. To help keep track of Type advantages, I also am using the Numbered Character Tiles.
I also decided that once you match 6 characters, you’ll swap that character out for another one so that you can use cards from your hand that didn’t necessarily apply to any of the Active Characters. This could provide more strategy for players. I still need to playtest a few more times to finalize some of the mechanics and make sure it’s all properly balanced, but I’m liking this mode more with these slight adjustments.
In addition to physical playtests, I also exported the Tabletop Simulator version of the game. I exported the cards and imported all of the additional pieces into the game.
I also set up the game to be more themed. I laid out all of the pieces so each player has their own mini-board to keep their pieces on so they don’t have to take pieces out each round and they can all be set up on the tables at once even if not all characters are in play. This will make it easier for players to start playing immediately without having to sort through a lot.
Then I uploaded it all to the Steam Workshop! It was pretty straightforward to upload it. I took some screenshots so I could put them on the page as well.
And with this, I updated my itchio page to include a banner image and link to the Steam Workshop version, as well as the one on TheGameCrafter.
I ended up doing some video recordings of some of the modes with the physical cards because I wanted to make a how to play video. It ended up being fairly difficult to record all of the parts and come up with the plays and what I wanted to talk about without a real script, but I got some footage of all of the modes. I had to finish the final mode later since my camera battery died before I could finish though.
I also did some test playing in Tabletop Simulator. I mostly just recorded a video for each mode so I could potentially use it for the how to play video in case I wasn’t happy enough with the other recordings. So now I have options for how to explain it.
I decided to go with the physical card video recordings and edited all of those together. I wrote a new script and made the recordings a lot more concise to only about 13 minutes long, which was great!
I re-recorded a few clips for the final mode and then recorded the voiceover. I finished editing it all together and officially finished the video!
I also finally painted my 3D printed pieces for The Gek player pawn! I put some primer on them and then painted them over the next few days. It was a long process since I had to wait for the paint to dry and put multiple layers on it. They turned out okay though.
After about a week or two, I finally finished painting them. I put a lot of layers of paint on them so the colors would pop out more.
So a lot of great progress this time! I’m nearing the end of this project; only 2 more posts left.